Novinky

List of articles

How the Installation of a Concealed GROHE Flush Button Works


How the Installation of a Concealed GROHE Flush Button Works (Video)

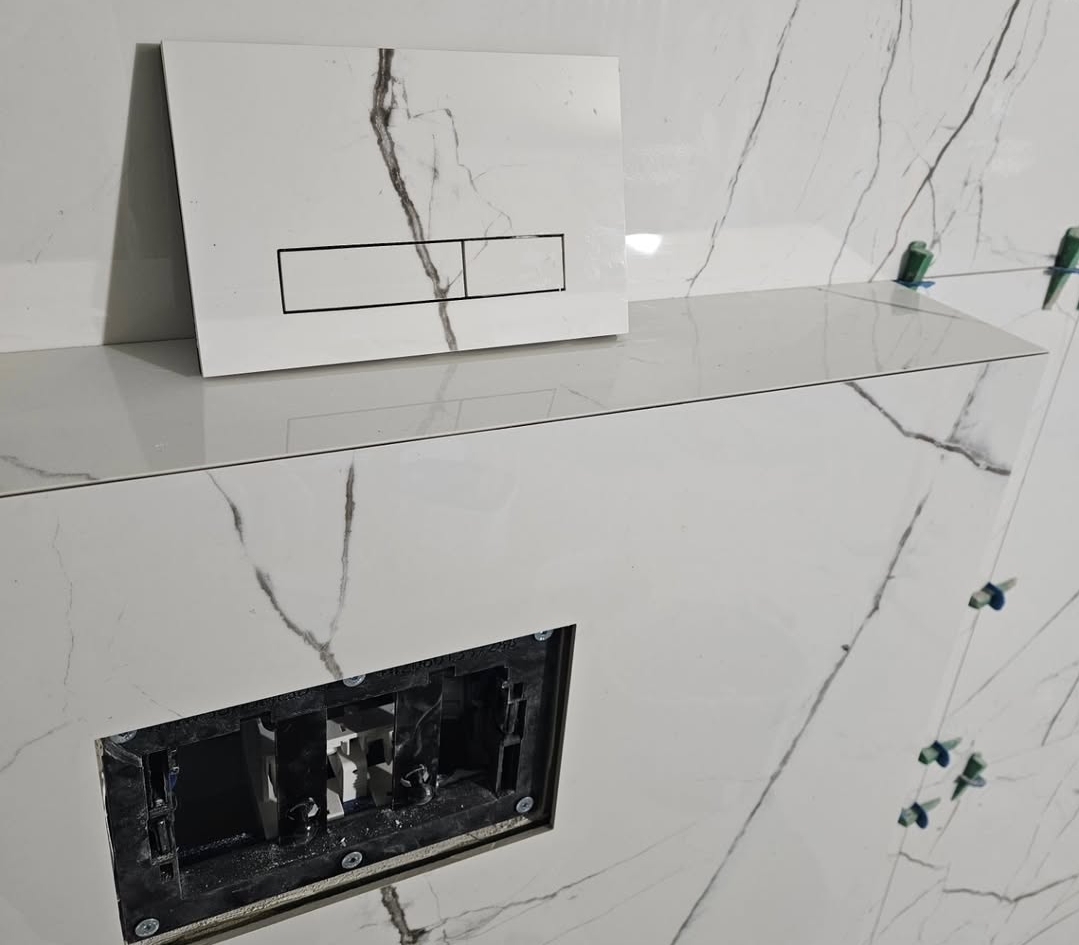
Minimalist bathrooms have become the standard today. Clean lines, no visual clutter, and technical solutions that remain hidden at first glance. This philosophy is exactly where a pneumatic concealed WC flush button compatible with GROHE systems fits in.

Unlike standard plastic flush plates, this solution is installed behind the tiles and is designed so that its front surface can be fully covered with ceramic tiles. The result is a virtually invisible flush button that blends seamlessly into the wall.

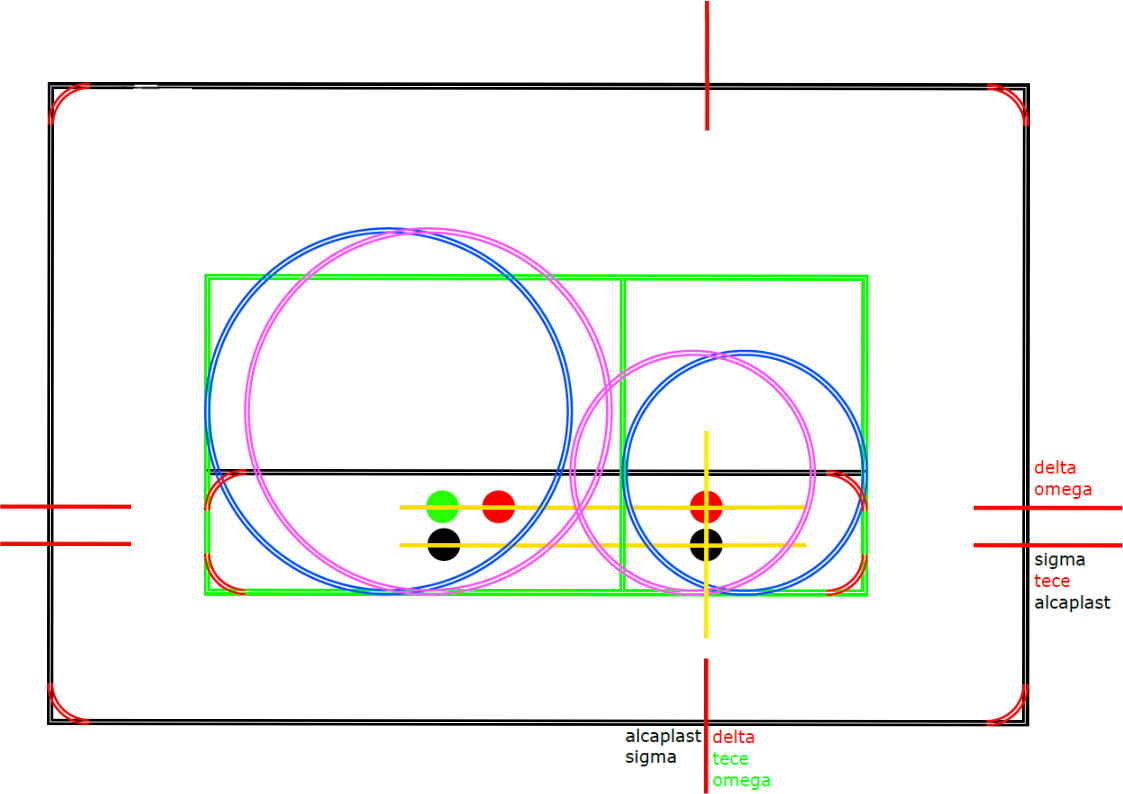
Attention to Detail: Precision Waterjet Cutting

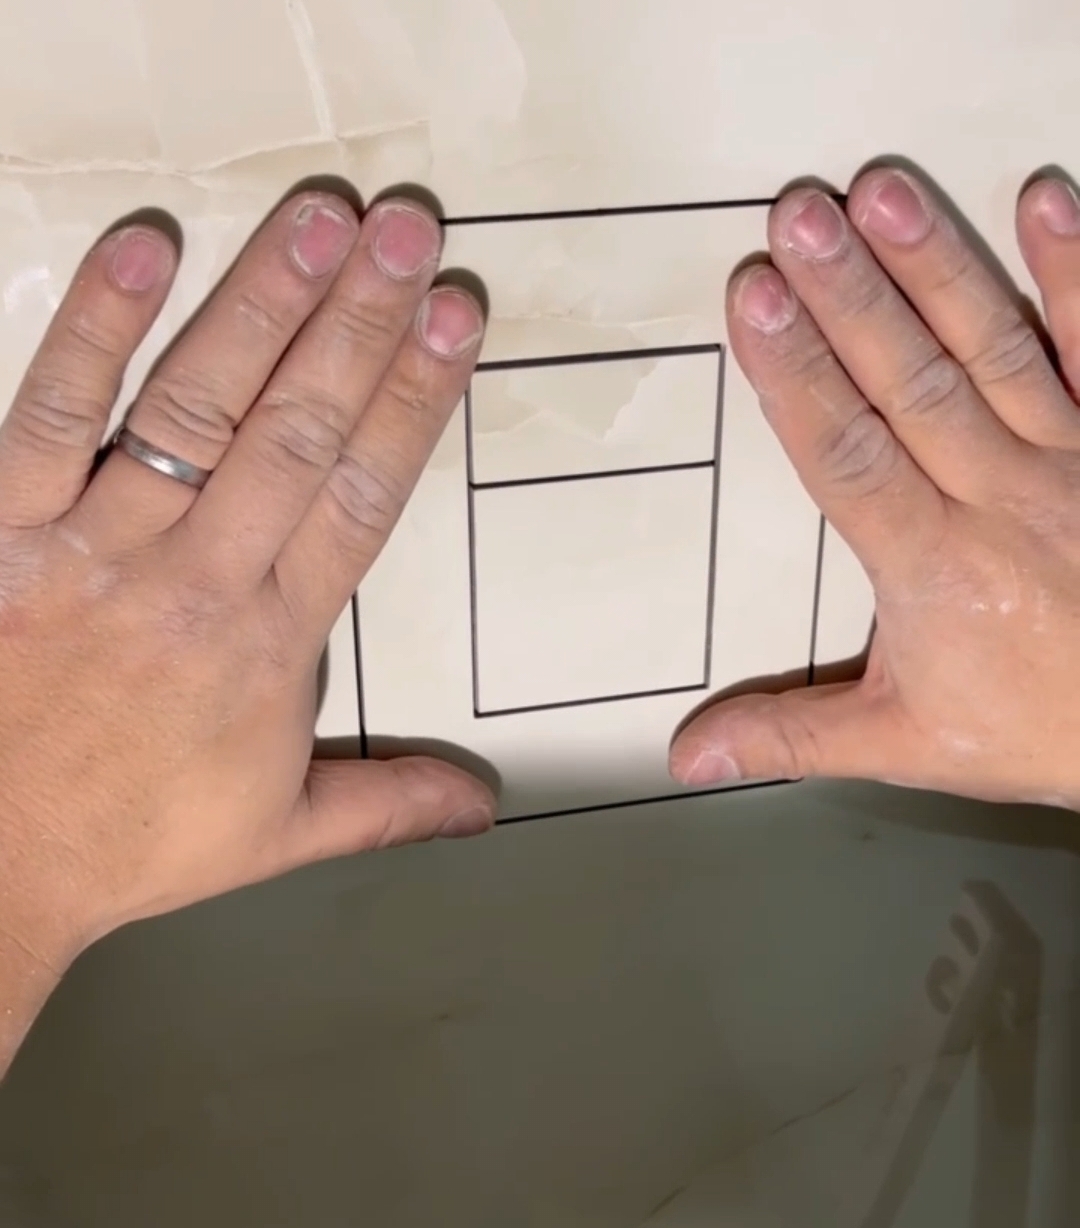
To achieve a truly flawless final appearance, we had the tile cut using waterjet technology.
This method allows for:

  • maximum cutting precision,

  • clean edges without damaging the tile glaze,

  • perfect alignment between the button and the tiled surface.

With concealed solutions like this, millimeters matter. Waterjet cutting ensures the result looks technically clean and professionally executed.

Installation Is Not for Everyone

It’s important to be honest:
this is not a DIY solution.

Installation must be carried out by an experienced tiler who:

  • has experience with concealed cistern systems,

  • uses precise cutting tools (ideally waterjet cutting),

  • understands material tolerances and tile work in detail.

Even a millimeter-level error is immediately visible — especially with minimalist designs.

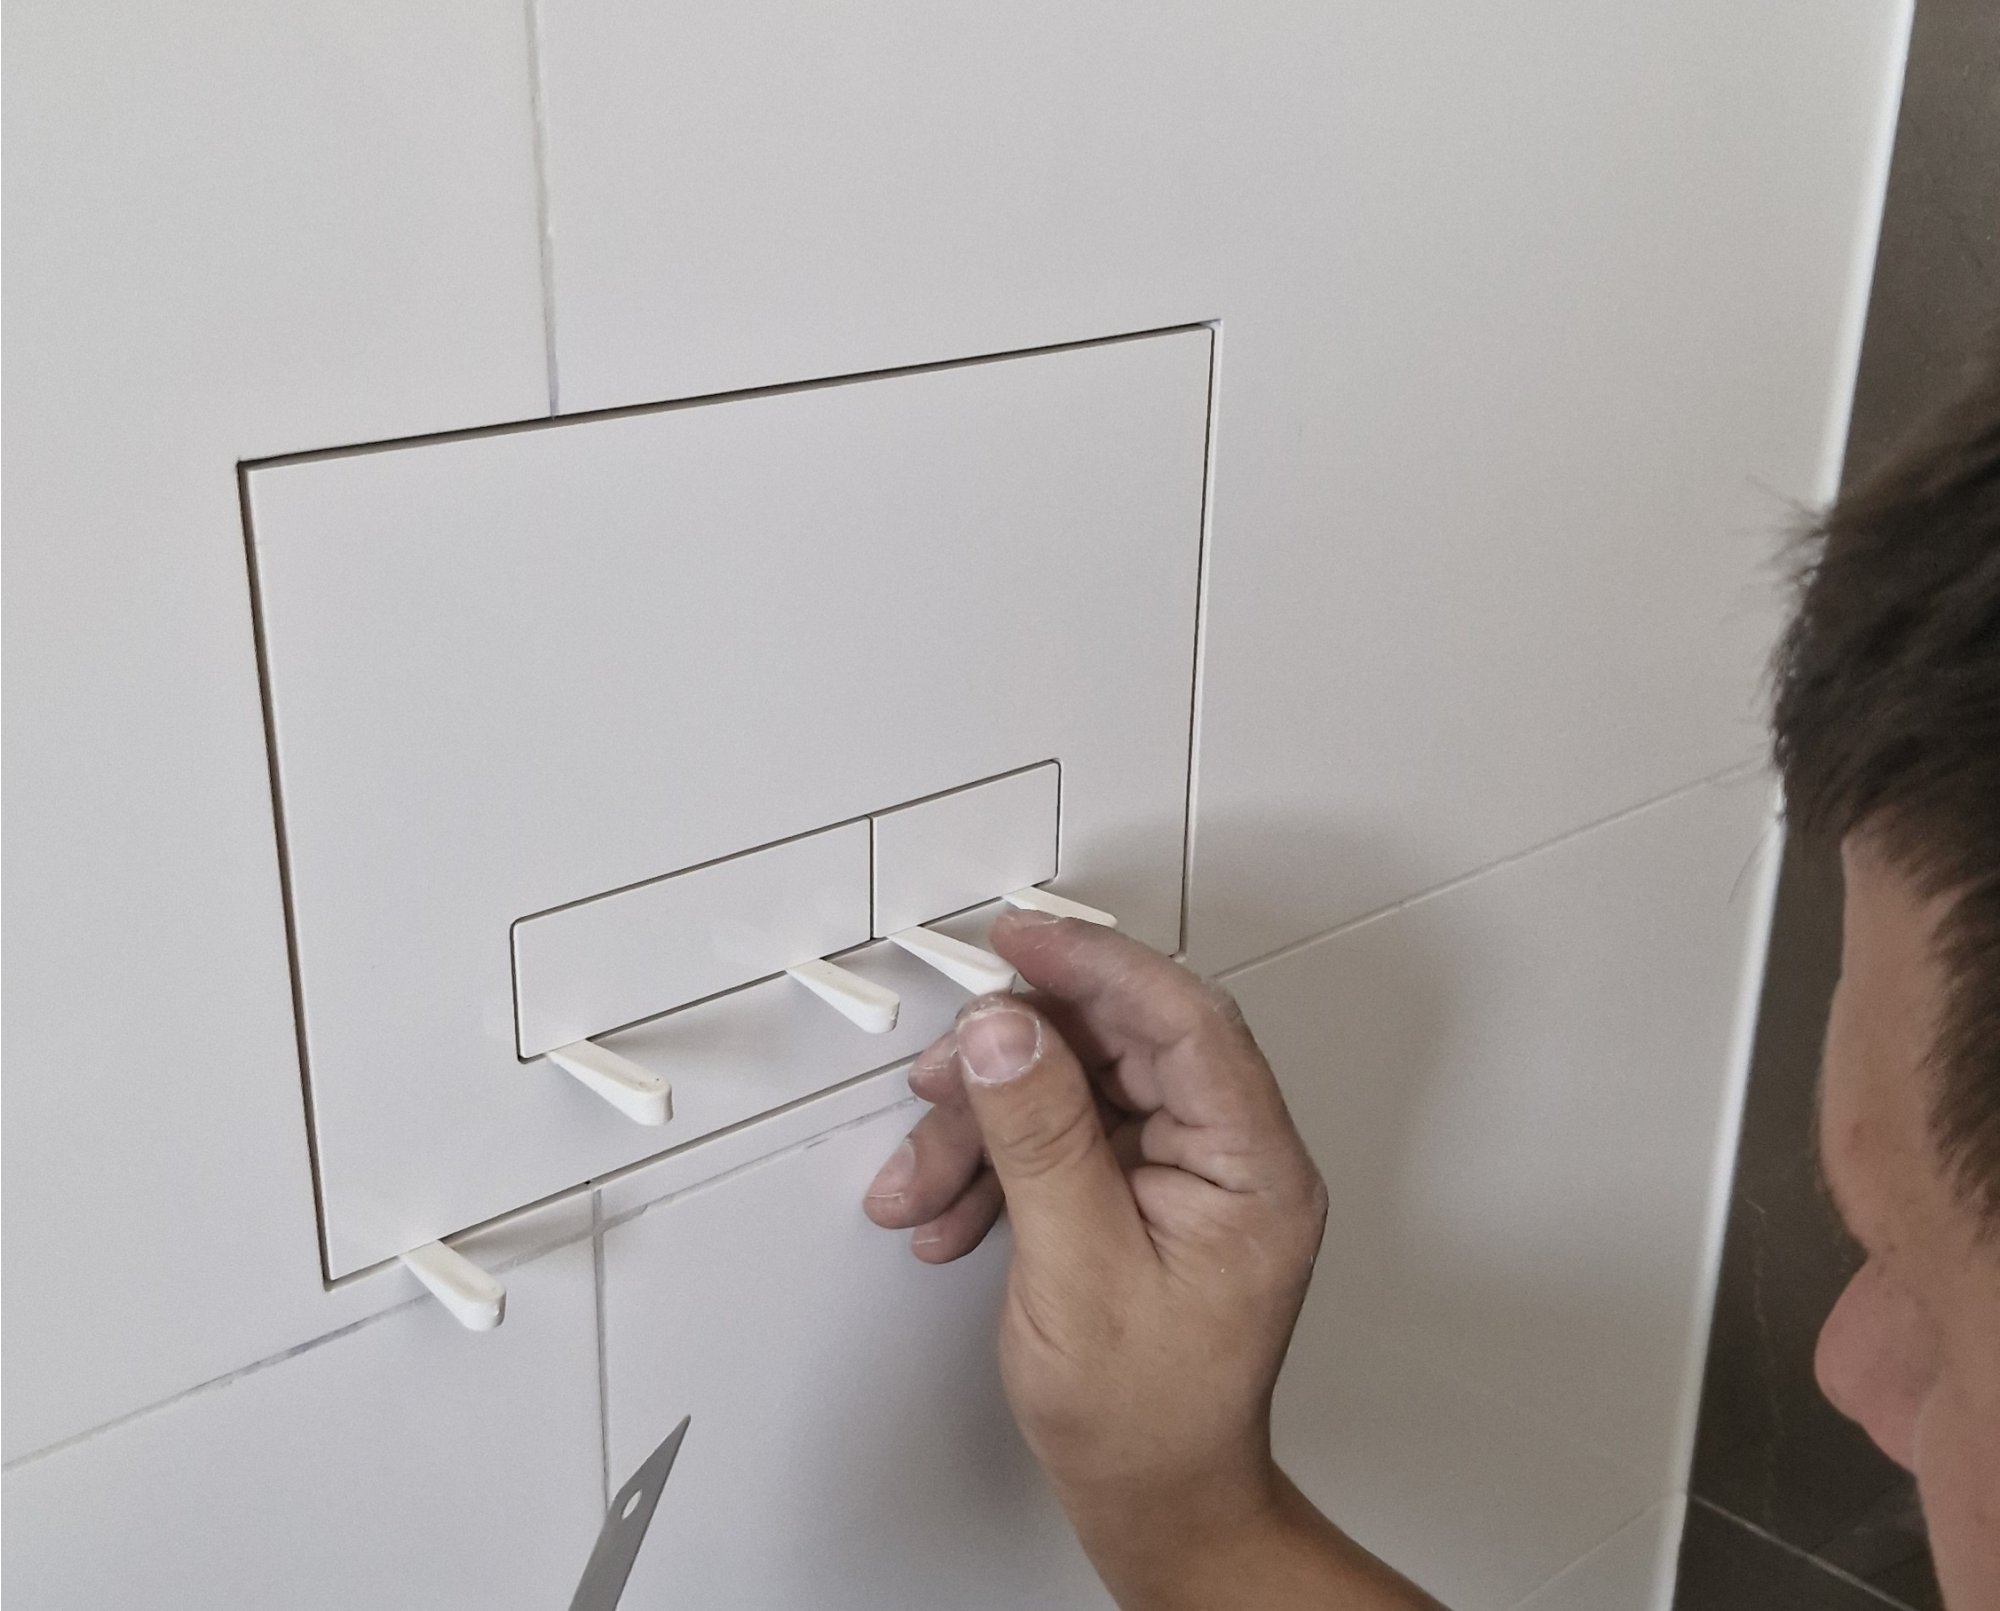
Practical Installation Example (Video)

To clearly demonstrate how the entire installation process works in practice, we have prepared a GROHE installation video, showing step by step:

  • preparation of the opening,

  • positioning of the frame,

  • connection of the pneumatic mechanism,

  • final tiling and precise alignment.

👉 You can find the installation video on our YouTube channel
(link to the GROHE installation video)

We recommend watching the video before starting the installation, ideally together with your tiler.

Who Is This Solution For?

This type of concealed flush button is best suited for:

  • new bathroom projects,

  • complete renovations,

  • customers who want a clean architectural detail without compromises.

If you’re looking for a fast and low-cost solution, a standard flush plate may be more practical.
If, however, you’re aiming for a technically precise, visually clean result, this solution makes perfect sense.

VIDEO: https://youtube.com/shorts/E2u-Jjzd7yQ?si=5UTZ-wZHL7U2Hv3p

How Our Template Simplifies Installation in a New Build

How Our Template Simplifies Installation in a New Build

In this short video, we present a complete new installation of our concealed flush button, carried out as part of a new tiling project. The video clearly demonstrates how the installation template, supplied with every button, is used during the preparation phase.

You can see how the template allows the installer to accurately define the position and dimensions of the opening before the tiles are installed. This ensures precise alignment, a clean final result, and eliminates the need for later adjustments or corrections during tiling.


https://youtube.com/shorts/4NpymIc8I3Y?si=LM7huva1RWUKAEyx

Can You Install an Under-Tile Flush Plate After the Tiles Are Already Installed?

Can You Install an Under-Tile Flush Plate After the Tiles Are Already Installed?

We often receive the same question from customers:
“Can I install your flush plate even if my tiles are already finished?”

The short answer: Yes, you can.

While it’s not the ideal situation, it’s absolutely possible and it’s done quite commonly. Many installers face the need to replace or newly install a flush plate after the tiling has already been completed — whether due to renovation, compatibility issues, or simply deciding to upgrade to a cleaner and more modern solution like the under-tile flush plate.

What to Expect

Because the opening in the tiles is already fixed, the installer needs to carefully adjust the existing cut-out. The process requires a bit more precision and patience compared to installation during tiling, but it’s manageable and usually without complications if done correctly.

Our system is designed so that the plate sits cleanly and securely even when retro-fitted. The result is visually seamless and fully functional.

Useful Tip

If your current opening is slightly smaller or uneven, it may need to be carefully enlarged. A diamond blade. 

Watch the Installation Video

To make the process easier, we’ve recorded a step-by-step installation video on YouTube.
You can watch it here:

VIDEO LINK Installation of a concealed flush button into already finished tiling.

Final Word

So yes — even if your tiles are already finished, you can install the under-tile flush plate without tearing down your wall. It’s not the textbook scenario, but it works and it’s common practice.


IMG-20251010-WA0007

Thank you for your purchase on eBay! Get -15% on your next order directly from us.

Thank you for your purchase on eBay! Get -15% on your next order directly from us.


Order directly from our official store and enjoy better prices, faster delivery and direct support.


CODE: EBAY15

         BUY        


  • Better price than on eBay

  • Fast EU delivery

  • Damage-Free Delivery Guarantee

⭐⭐⭐⭐⭐ "Perfect product, fast delivery, five stars"

How to Install an Under-Tile Flush Plate — Step-by-Step Guide


How to Install an Under-Tile Flush Plate — Step-by-Step Guide

If you want a minimalist, seamless bathroom look, installing a flush plate hidden under the tiles is an impressive solution. The process isn’t complicated, but precision is crucial — especially when cutting plasterboard and tiles. Below is a practical guide to help you complete the installation smoothly and professionally.


1. Preparing the Plasterboard or Plaster (Ytong) Panels

Start by cutting two installation panels that will support the mechanism.

Panel Cutting

  • Cut the first panel to 210 mm x 109 mm.

  • Cut the second panel to 238 mm x 155 mm.

If you’re working with plaster (Ytong), use the same procedure as for plasterboard.

Drilling and Preparing the Mounting Area

  • Drill six holes (as marked in the technical drawing) to allow the adjustment screw threads to pass through the first panel.

  • Cut the protective collar so that it is flush with the front surface of the first panel.


2. Mounting the Plastic Frame to the Toilet Tank

Installing the Rear Part of the Flush Plate

  1. Insert the rear mounting frame and secure it using the plastic pins in the marked locations.
    Break off the excess pin length so everything sits flush.

  2. Tighten the locking wedges to fix the frame firmly in place.

  3. Install and secure the flush rods, adjusting them with the screws to ensure proper toilet operation and avoid leaks.

  4. Use the six adjustment screws to align the surface of the flush plate perfectly with the surrounding tiles.


3. Cutting the Tile

This step requires precision and professional tools.
It must be done by a qualified tiler with experience in cutting tiles for concealed mechanisms. Incorrect cutting may ruin the tile or prevent proper installation — don’t improvise here.


4. Gluing the Tile to the Flush Plate

Use a strong, flexible adhesive intended for this purpose, for example Soudal Fix All.

Tile Bonding Procedure

  • Thoroughly degrease the back side of the tile.

  • Apply adhesive evenly to the prepared surface of the front part of the flush plate.

  • Place the tile onto the plate and align the joints with surrounding wall tiles.

  • Use wedges for perfect positioning and fixing of the joint width.

  • Allow the adhesive to cure for at least 12 hours without movement.


5. Installing the Finished Front Flush Plate

Once the adhesive has fully set:

  • Mount the front tile-covered plate onto the adjustment screws of the rear mechanism.

  • Press gently until it locks securely in place.

And you’re done — the flush plate is now perfectly integrated into the wall, visually indistinguishable from the rest of the tiled surface, providing a clean and luxurious look.


Final Thoughts

A concealed under-tile flush plate adds premium aesthetics to any bathroom. Precision and patience are key. If you follow these steps carefully (and trust a professional tiler for the cutting), the result will look outstanding and will last for years.


 How to Install an Under-Tile Flush Plate — Step-by-Step Guide 1How to Install an Under-Tile Flush Plate — Step-by-Step Guide 2

Listing controls

5 items total